Setting up RStudio with Bioconductor on Nectar Cloud using Docker
This short tutorial will cover setting up an RStudio Server on the Nectar Research Cloud, using a Bioconductor Docker container.
Background
RStudio is an integrated development environment (IDE) for the R programming language, and is the IDE of choice for many R users. While it is possible (and not too difficult) to run RStudio on a local machine, it is often useful to run RStudio on a cloud-based server. This lets you specificy computing resources which match the task at hand. For example, tasks such as mapping sequencing reads to a reference genome are often quite RAM intensive, and may not run on a laptop or small desktop machine (especially for larger genomes). Moving analysis to a cloud environment solves this issue.
Nectar Cloud is a research cloud service run by the Australia Research Data Commons (ARDC), and is available for members of participating organisations (many Australian and New Zealand universities). In this tutorial we will be demonstrating how to set up an RStudio server on a compute instance running on the Nectar Cloud.
We will also be utilising Docker to enable easy and consistent deployment of our RStudio server. Docker is an open-source platform centered around the use of small, light-weight containers that enable isolation of software packages and associated dependencies. In this tutorial, we will be using a Bioconductor Docker container that contains RStudio, R and a basic set of R packages for bioinformatics research.
Prerequisite knowledge and requirements:
- A computer with internet access and a modern browser
- Access to the Nectar Cloud (requires membership of an Australian research institution)
Step 1: Login to Nectar
In your browser, visit https://nectar.org.au and click the CLOUD LOGIN link. Follow the steps to log in, and you should end up at the Nectar Dashboard. If you haven’t used Nectar before, you will have a default trial project allocation with a small amount of available resources to play around with. This trial allocation is supposed to provide roughly 3 months worth of compute time, after which you will have to apply for an allocation for your particular research project.
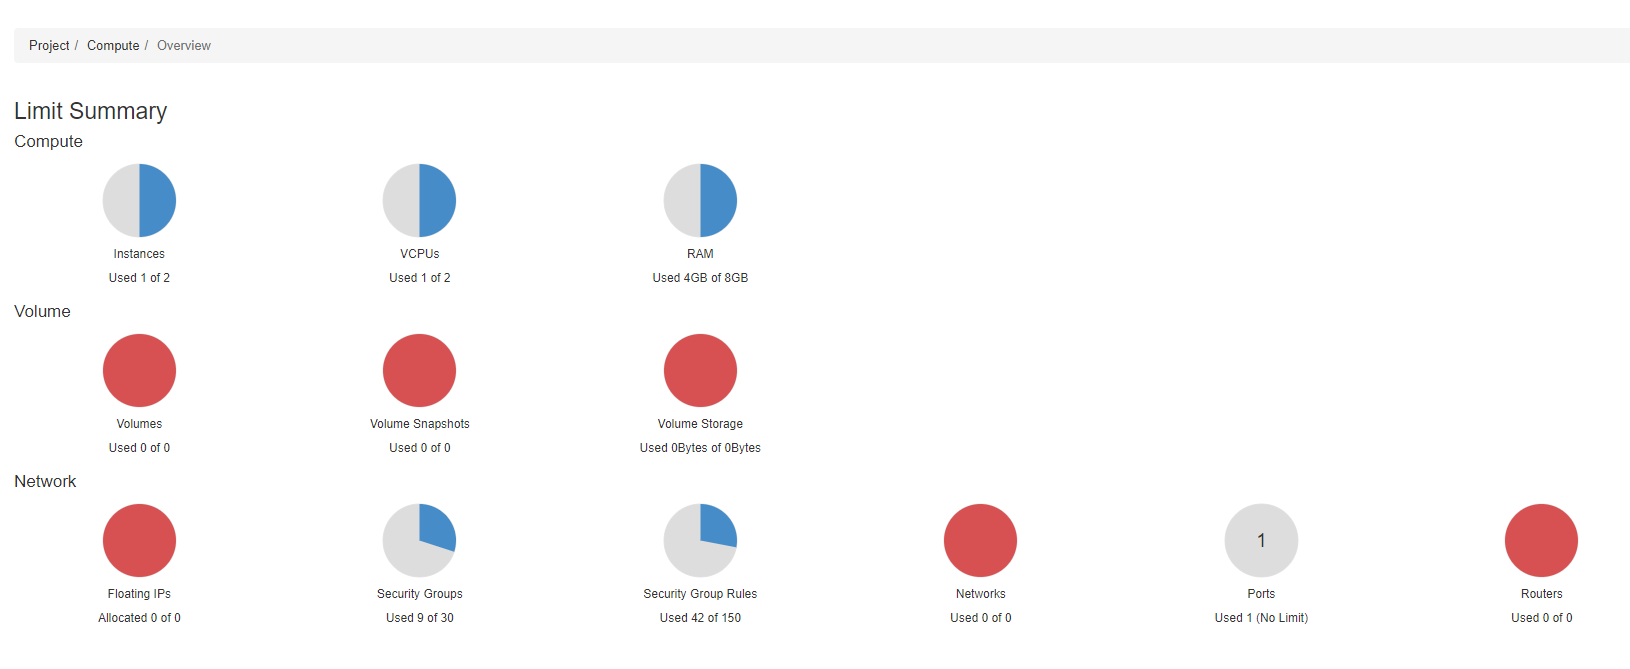
You can see in the above example that I currently have 1 instance used, which is using 1 virtual CPU (vCPU) and 4GB RAM. Trial allocations do not have access to Volume Storage, so these appear fully utilised.
Step 2: Generate an SSH key pair for use with Nectar (optional)
To access a running compute instance via SSH (not strictly required for this tutorial), you need to provide an SSH key. If you have previously used Nectar, you may alreay have an existing key pair. In this case, you can safely skip this step.
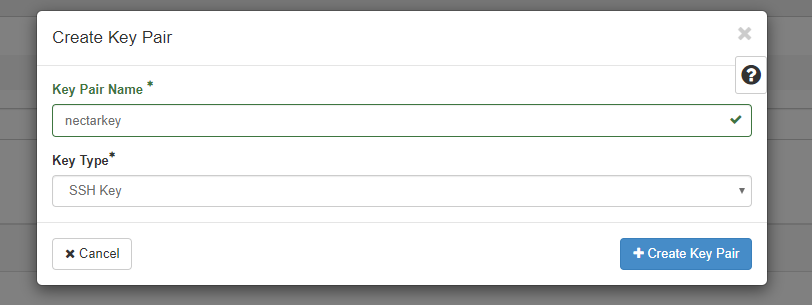
We can generate a new SSH key pair by navigating to Project > Compute > Key Pairs. Click Create Key Pair, give it a descriptive name (I’ve called mine nectarkey) and set the Key Type to SSH Key. Click Create Key Pair
Keep the .pem file that was downloaded in a safe place - this will be needed if you want to SSH into a running instance that is set up with that key pair.
Step 3: Start a Docker Host and Container
3.1: Set up a Docker Host
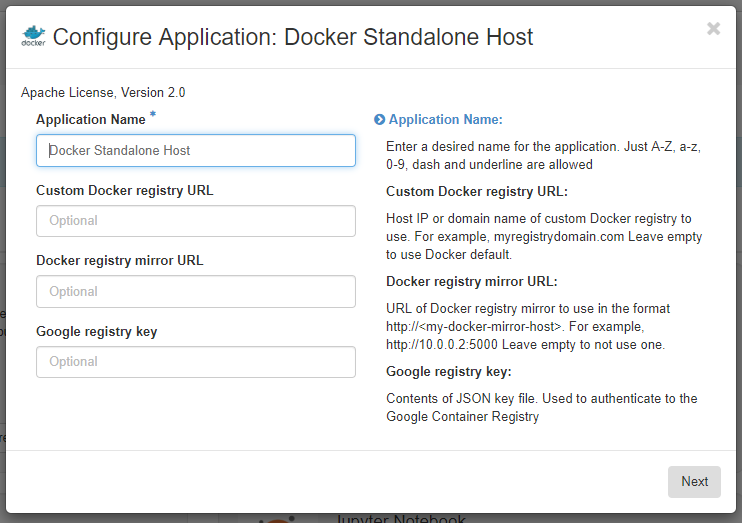
Navigate to Applications > Browse > Browse Local. We will first set up a host to run our Docker container - this is just a Ubuntu instance with docker installed. Find the Docker Standalone Host app (it may be on the next page), and click Quick Deploy. Give your host a descriptive name (I’m leaving it as the default Docker Standalone Host), and leave all the other options blank (if you wanted to use a Docker registry other than the Docker default, you would add your preferred registry here).
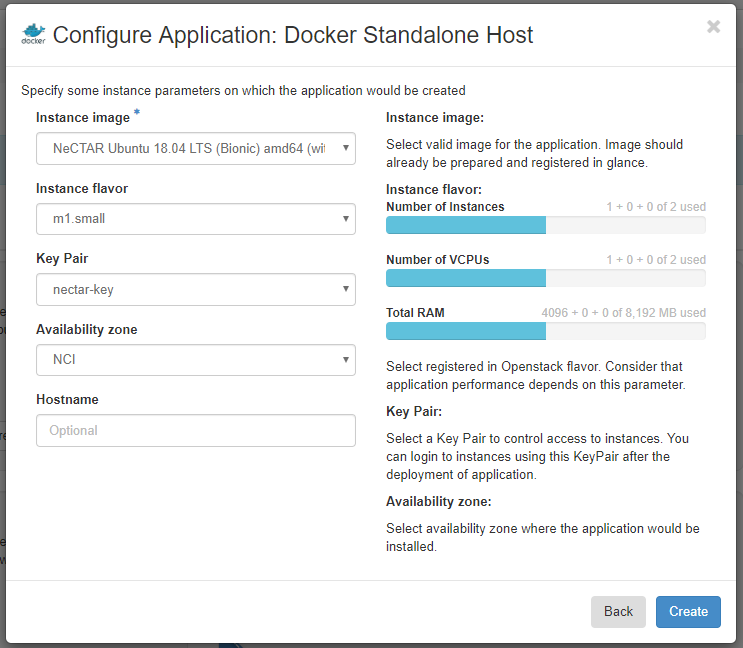
Click Next, choose an instance flavor of m1.small (you can choose something bigger if you need the extra resources and have the allocation to support it), choose the key pair you created earlier, and choose a preferred availability zone (leave this at the default if you are running this in a trial allocation and haven’t been allocated to an availability zone as part of a project allocation). Click Create.
This will create a new environment for you (probably named something like quick-env-1), and get your host container ready for deployment. Note that nothing has been deployed yet!
3.2: Choose a Docker Container
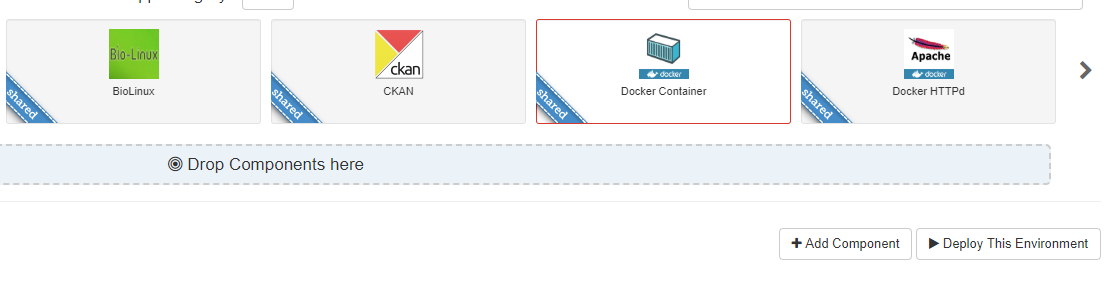
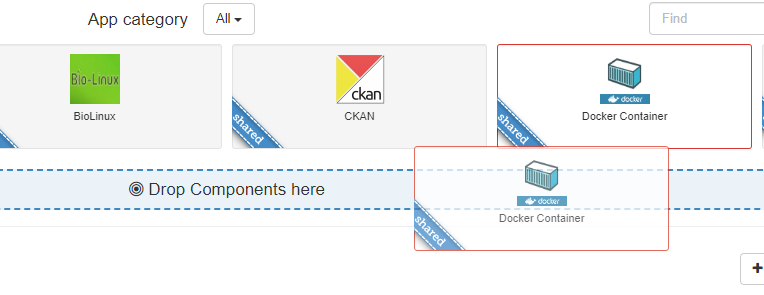
We now add a Docker container to the environment, which will be running on the Docker host we just configured. Drag and drop the Docker Container app into the space marked Drop Components here, and this will open a dialogue box to configure your Docker container.
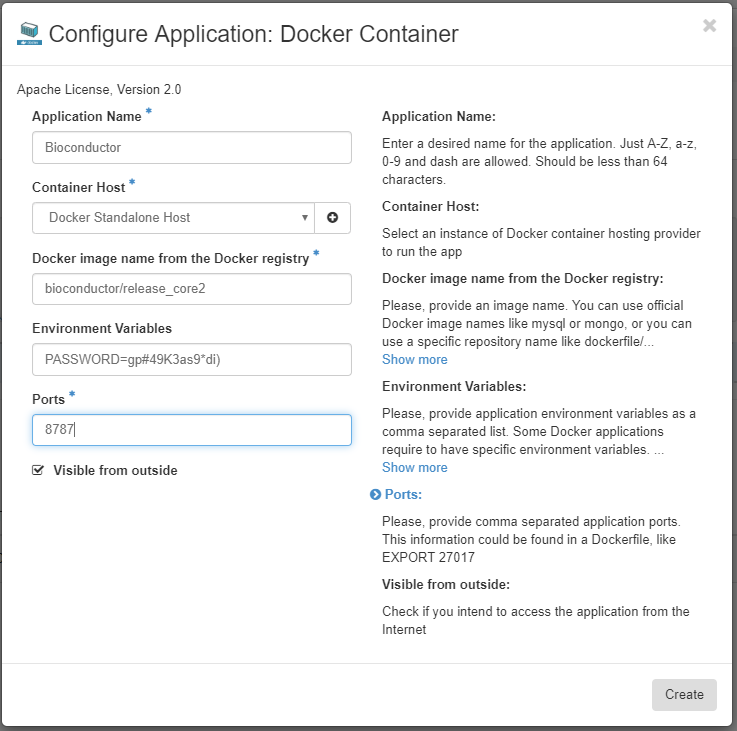
Choose an appropriate Application Name and make sure the Docker Host you set up previously is chosen as the Container Host.
We will now choose an appropriate Docker image. The Docker images released by Bioconductor contain RStudio, the BiocManager package for package management, and optionally a number of core packages for bioinformatics analysis. We will use the bioconductor/release_core2 container for this tutorial. See here for other options. Put bioconductor/release_core2 as the Docker image name, put PASSWORD=your_secure_password into the Environment Variables field, replacing your_secure_password with a password that is both strong and not used for anything else (consider using a password manager to generate and store passwords, if you don’t already). Add 8787 to the Port field - this is the port that the RStudio Server uses. Finally, make sure Visible from outside is ticked, and click Create.
Step 4: Deploy Docker container and host
You can now click Deploy this Environment, and wait while the Docker Host is started and the Bioconductor container is downloaded and deployed.
This will take a few minutes - wait until the deployment is finished, and you will be given an IP address to access RStudio.
Step 4: Access RStudio via the web browser
Once both the Docker Host and Bioconductor container are deployed, you can access your RStudio server by copying and pasting the provided IP address into a new browser window (don’t forget to include the :8787 port at the end of the IP address). Login to RStudio using rstudio as the username, and using the password you set previously.
Step 5: Stopping the Docker Host instance
Once you’re finished up doing your analysis and don’t need your container and container host anymore, remember to delete the associated environment - this should delete the associated compute instance and free up resources for you to use on other instances.
To delete an environment, go to Application > Applications > Environments, select the check box next to your environment, and click Delete Environments.